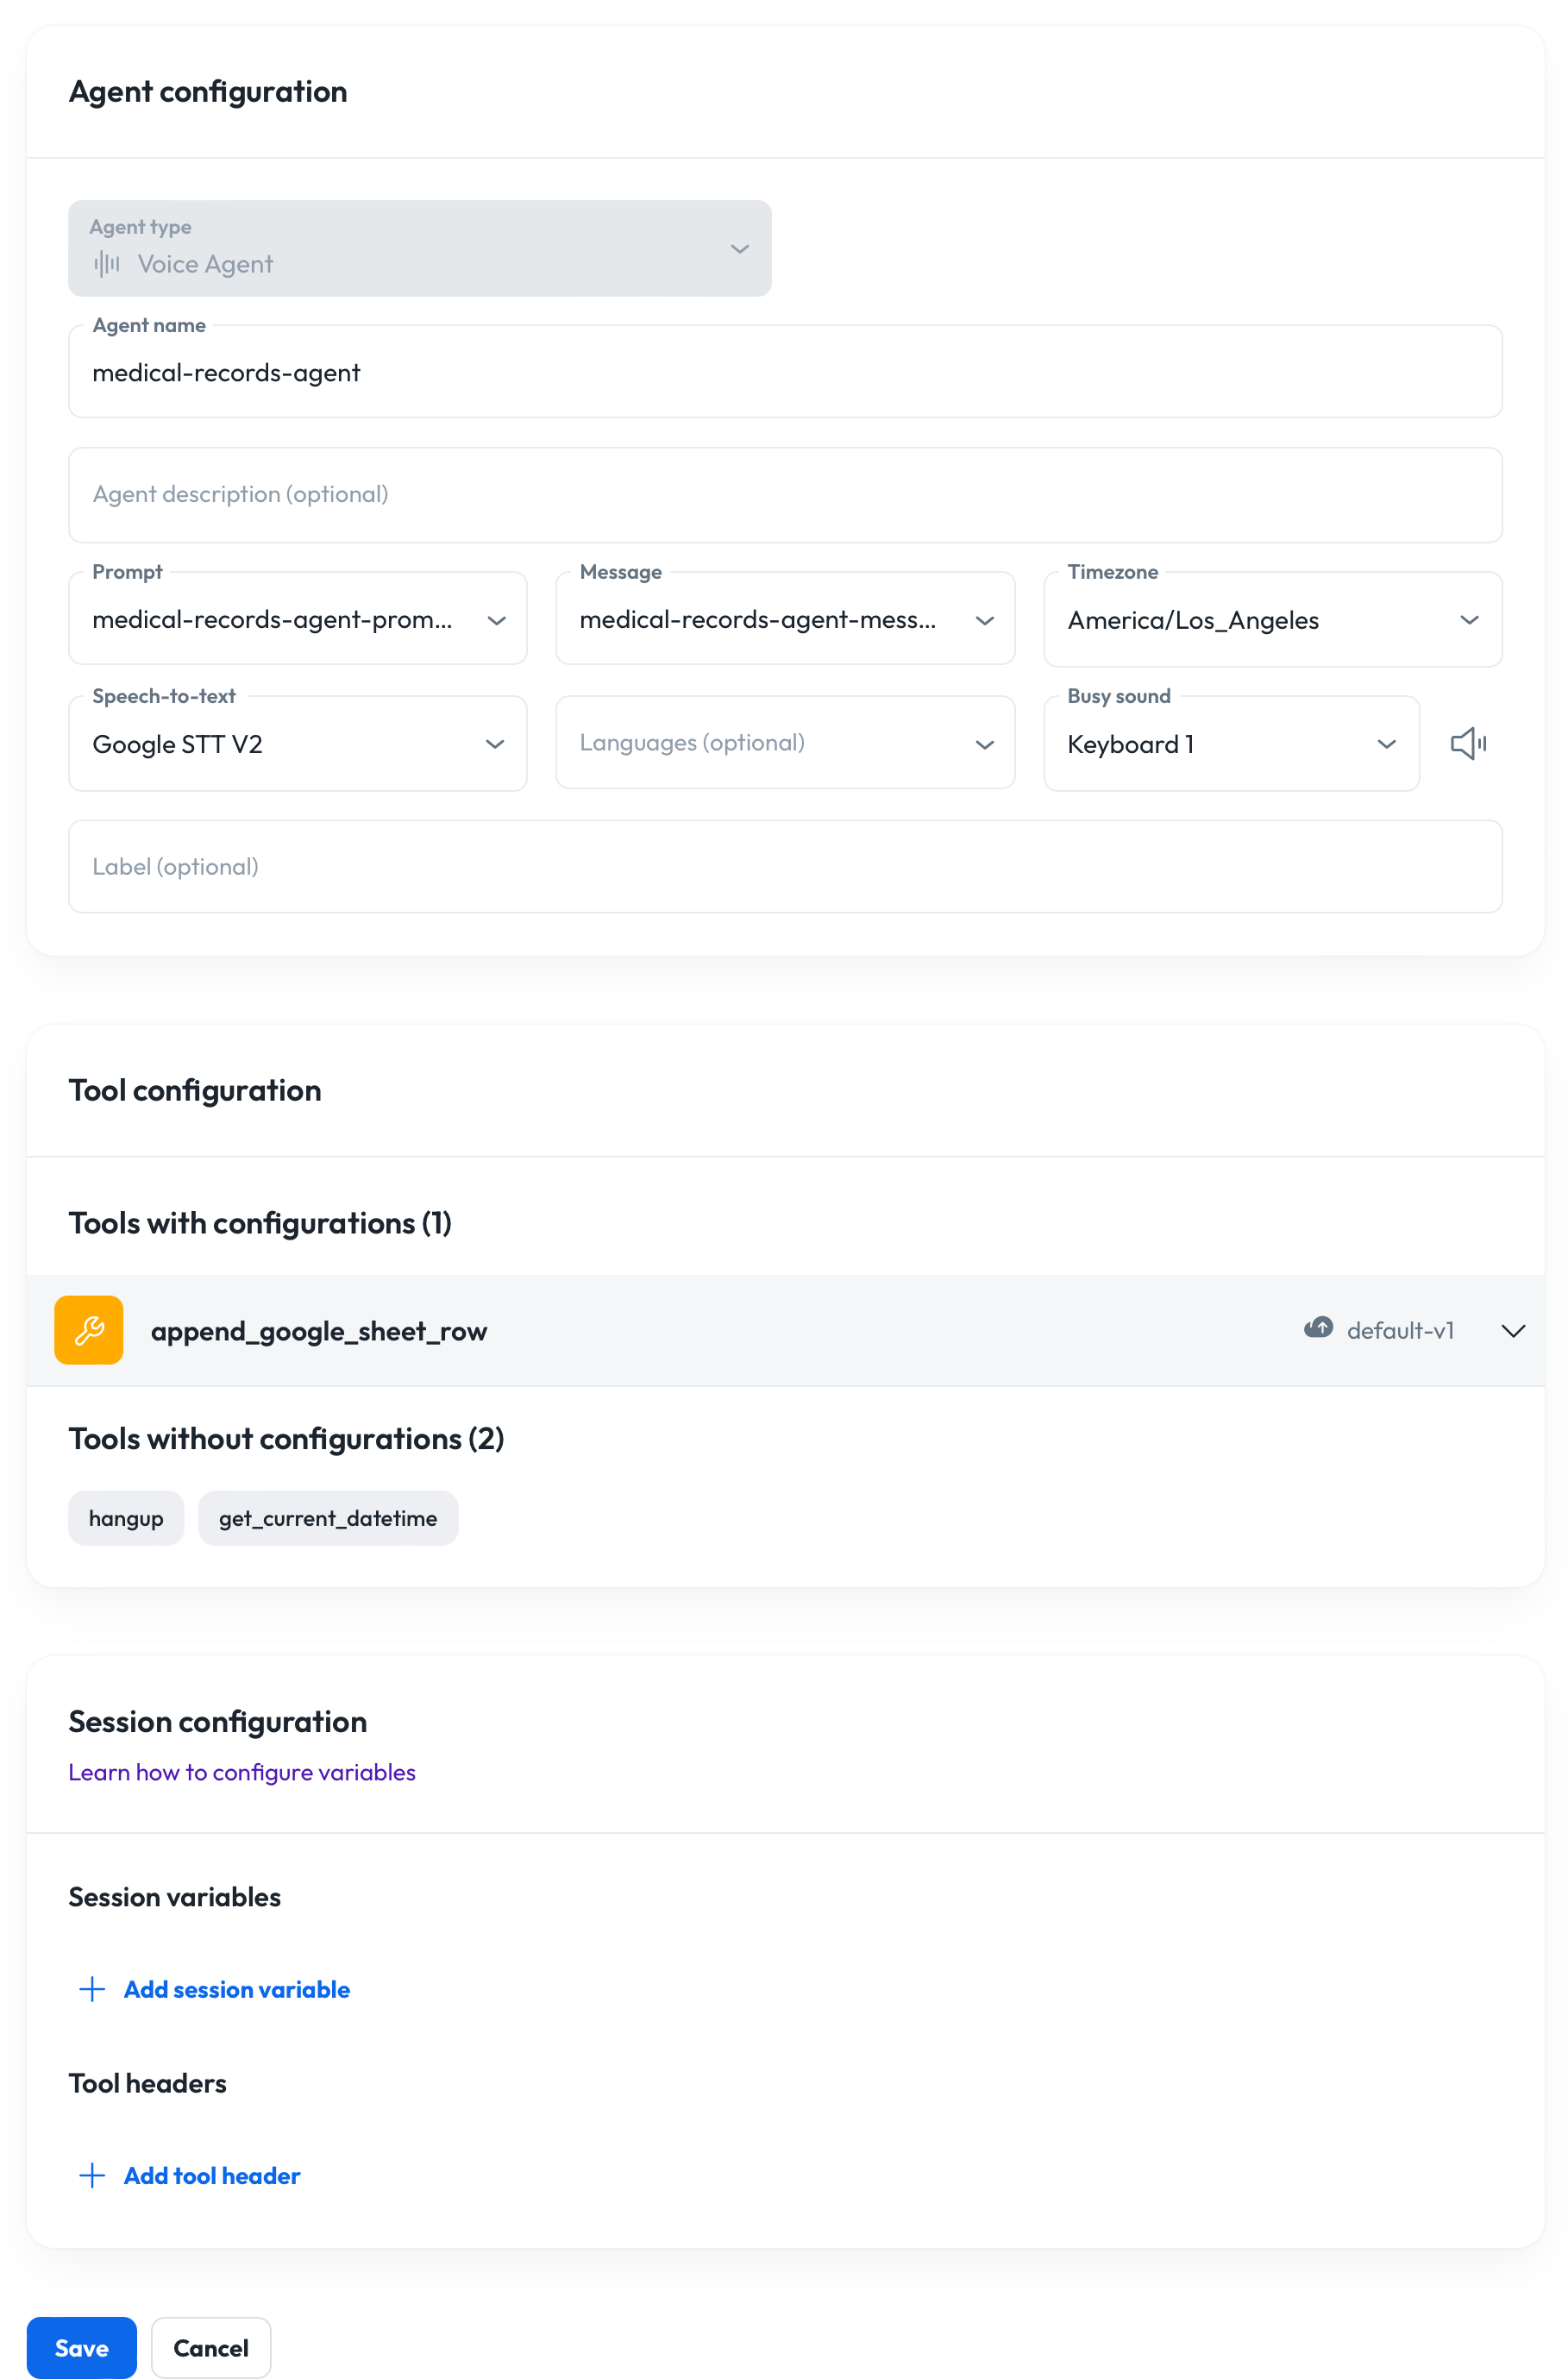
- Agent name: The name of the agent is used to reference it elsewhere in Console, so you should pick something that’s easily identifiable. You can enter
medical-records-agenthere. - Agent description (optional): This description is displayed for extra context on the agent list screen you just saw. For this agent you can enter “Outbound medical records agent” here.
- Prompt: The prompt that the agent will use for the LLM. Select your
medical-records-agent-prompthere. - Message: The message that the agent will deliver to the user at the beginning of a conversation. Select your
medical-records-agent-messagehere. - Timezone: The agent’s home timezone. You can select your local timezone here.
- Speech-to-text: The speech-to-text provider that the agent will use to interpret user input in voice conversations. You can select
Google STT V2here. - Languages (optional): If you have configured a language group, you can select it here to provide the agent access to the language group’s languages and voices. You can skip this field for this tutorial.
- Busy sound: The sound that will be played to the user in voice conversations after they finish speaking while they’re waiting for a response from the agent. You can select
Keyboard 1here. - Label (optional): Labels are used for filtering agents on the agent list screen. You can skip this field for the tutorial.
- Session configuration: You can use this section to set other agent-level configuration values. You can skip it for the tutorial.
- Tools with configuration:
append_google_sheet_row tool.
By default, the tool is connected to a shared sheet managed by Syllable, which is used for showcase purposes. This default sheet is not visible to you. If you want to view or manage the captured responses, you’ll need to connect your own Google Sheet to the tool.
To use your own Google Sheet, create a service account and share access to the sheet. Follow Google’s guide to creating a service account and key, then enable the Sheets API, and share your sheet with the service account’s email.
Then go to the agent’s configuration and under tool configuration, Sheet ID and Sheet Name to point to your Google Sheet.
You also then should add your Google service credentials to the agent’s tool headers. Name the Tool Header
X-Google-Service-Credentials and add google credentials to it for example: