- Tools: Agent tools are APIs that an agent can use, such as schedule an appointment on behalf of your user, request a prescription refill, or other countless other tasks.
- Services: Services are authentication credentials that multiple tool can use.
Agent tools
If you want an agent to reference a specific tool during sessions with users, then you need to provide those instructions in the prompt. For example, if you want to provide hangup instructions to your agent, it might look something like:Before a call ends, make sure to always ask user whether they need anything else. If user doesn’t need anything else, use “hangup” tool.
Creating an agent tool
To create an agent tool, click the “New tool” button on the top right of the list screen.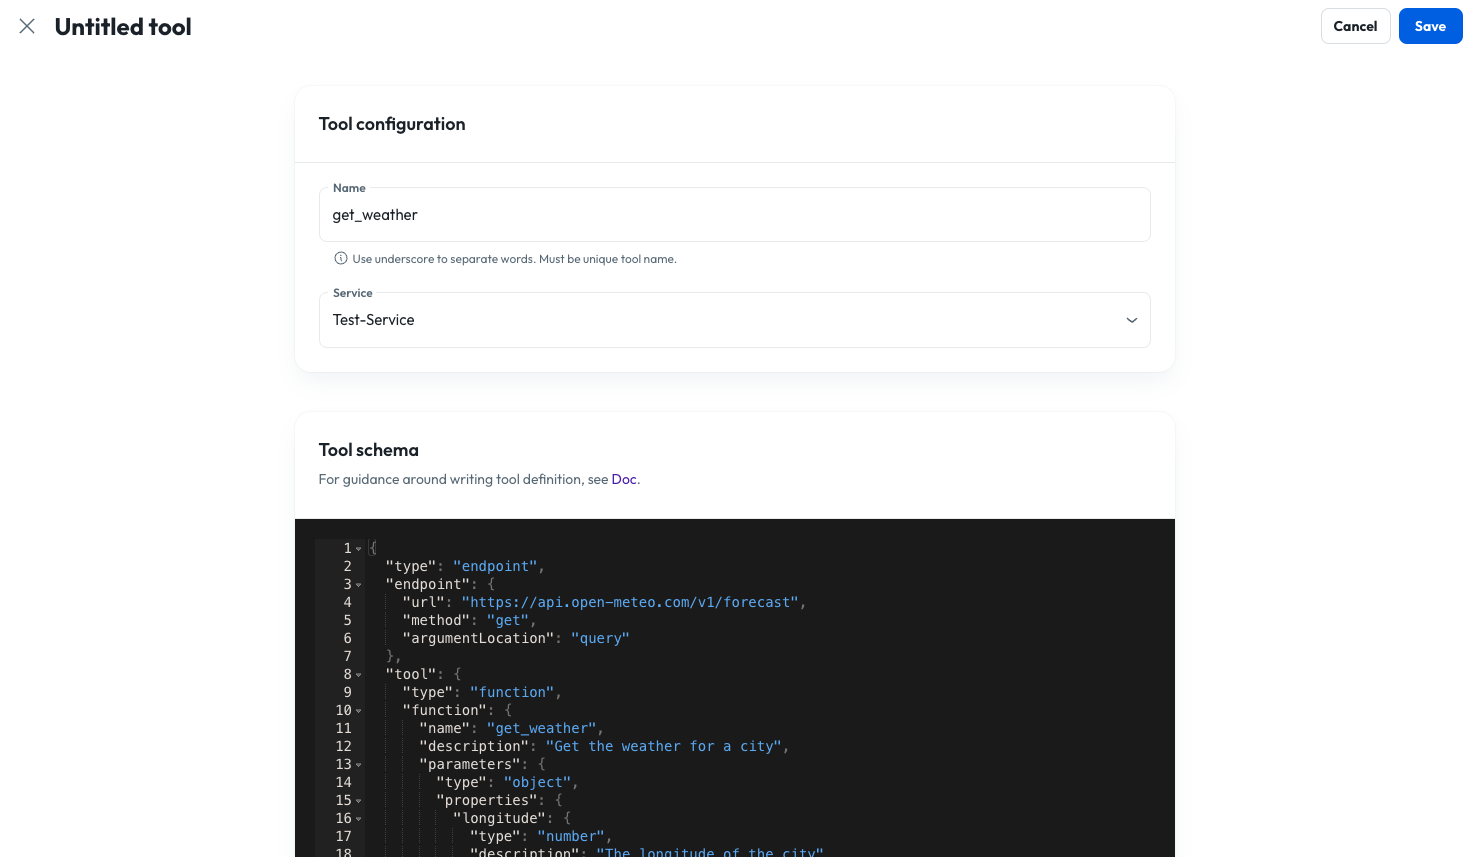
- Name: The name of the tool is used to reference it elsewhere in Console, including in prompts and agents, so you should pick something that’s easily identifiable. It shouldn’t contain any whitespace.
- Service: A service is a grouping of tools. You can select any available service here to add your new tool to that service.
Agent tool schema
You define the behavior and capabilities of a tool using the Tool Schema. More details on the structure of the schema are available here. An example schema to call the Open-Meteo API to look up weather information is below. (Note that the value of the “parameters” field must be defined as a JSON Schema per the OpenAI API.)- The “endpoint” object gives the agent details on what API endpoint to call and how to pass the parameters (in the body of a POST request).
- The “tool” object includes a description of the tool, which should be written as instructions to the agent regarding what the tool does. It also includes a “parameters” object, which describes the various parameters that the agent should gather from the user’s input and send to the API endpoint in the “endpoint” object. (In this case, if the user says, for example, “What is the weather in New York City?”, the agent can determine the relevant latitude and longitude from the city name.)
- The “staticParameters” object also describes parameters that should be sent to the API, but are predetermined at configuration time, rather than gathered by the agent from the user’s input. They can be configured here at the tool level, but can also be overridden at the agent level, so that different agents can use the same tool (by using a prompt that has been linked to that tool), but specify different behavior for that tool. For more information, see the Tool Configuration section.
Using Variables in Tools
Variables can enhance your tools by making descriptions more contextual and setting dynamic default values in static parameters. Variable usage in tool descriptions:- Dynamic defaults: Set contextual default values that change per session
- Personalized descriptions: Make tool descriptions more relevant to the current interaction
- Session tracking: Include session or user context in tool parameters
Services
Services are a centralized place to store authentication credentials to be used by multiple tools. This way, authentication will only need to be configured once and multiple tools can reuse the same service for authentication within a session.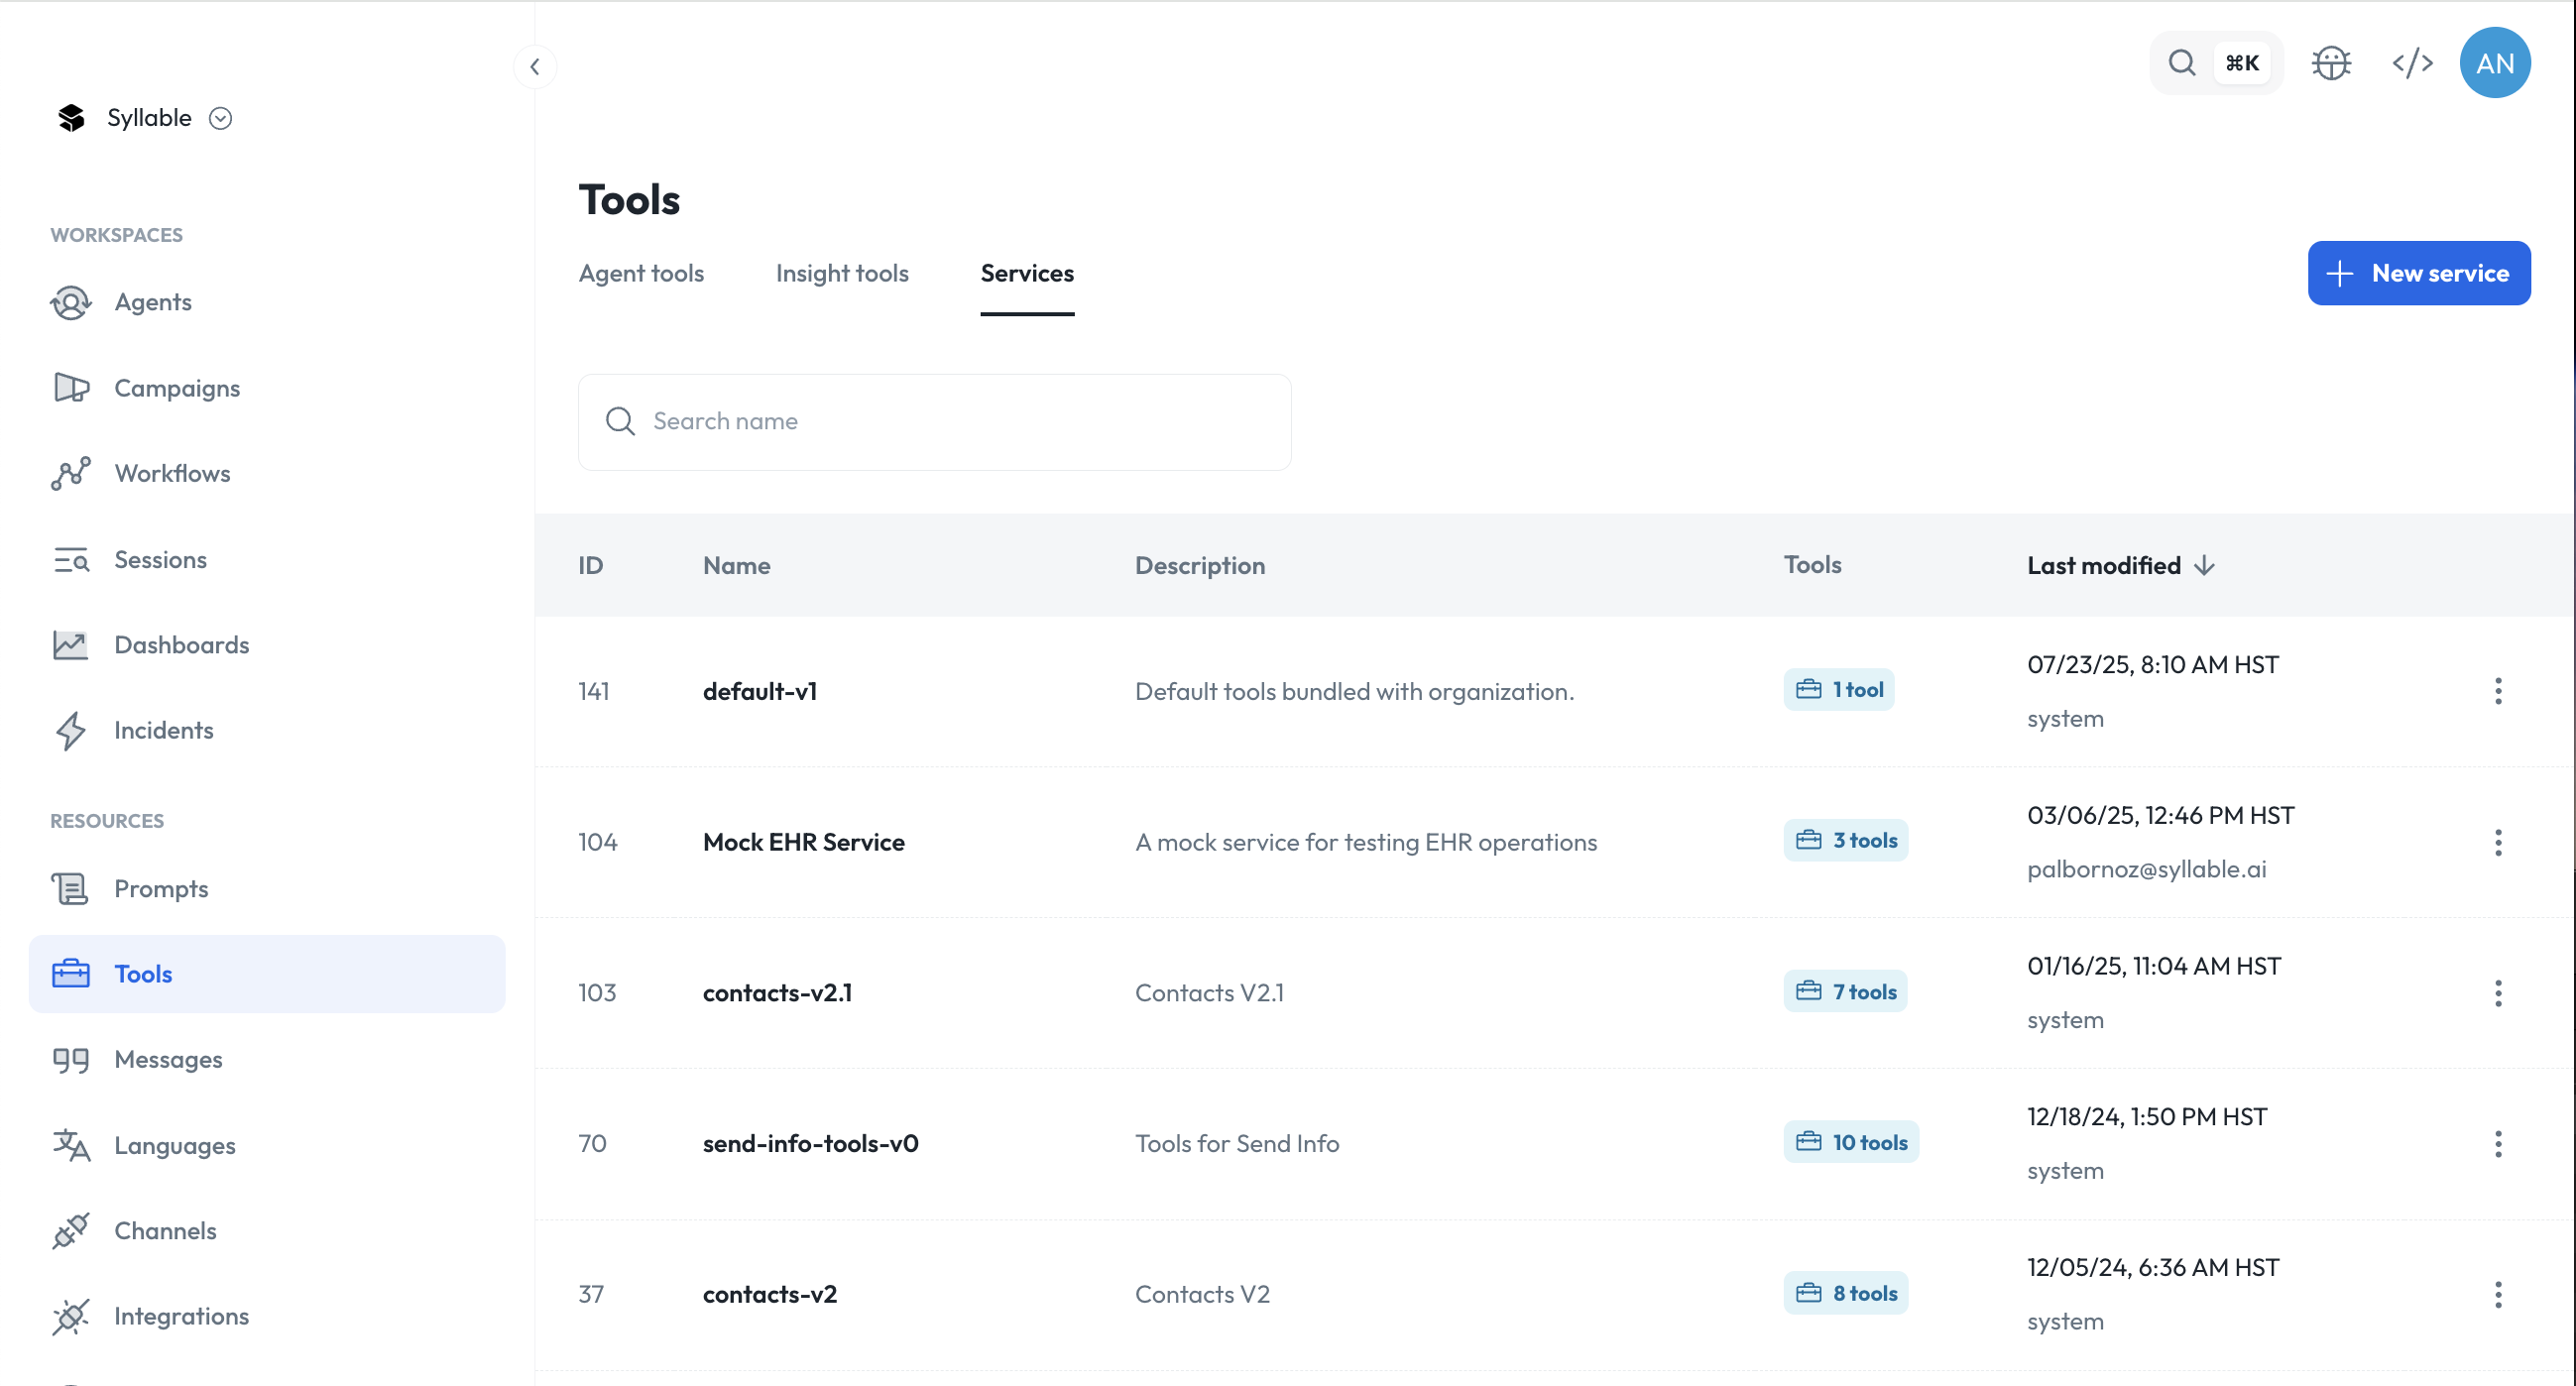
Creating a service
To create a service, click “New service”.- Name: Name of the service
- Description (optional): Description of the service
- Auth type (optional): Authentication type

- Basic: This type of authentication requires username and password.
- Bearer: This type of authentication requires a token.
- Custom headers: This type of authentication allows multiple custom headers with unique key value pairs.
- You will not be able to view these credentials in the platform because we do not save or store them.
- You cannot generate new credentials in our system, you must generate them yourself in your third-party system and remember to copy paste them back in.


System tools
The Syllable platform provides system tools already built and ready for you to use out-of-the-box. System agent tools:- check_voicemail: Detects if a voicemail or a person is picking up the phone.
- hangup: Hangs up on the caller.
- transfer: Transfers a call to a phone number.
- web_search: Looks up information from a website.
- get_current_datetime: Get the current date and time.
- dtmf: Enables DTMF input.
- summary-tool: Summarizes and assigns a rating for a session.
- default-v1: Default service categorization to group tools within an organization.
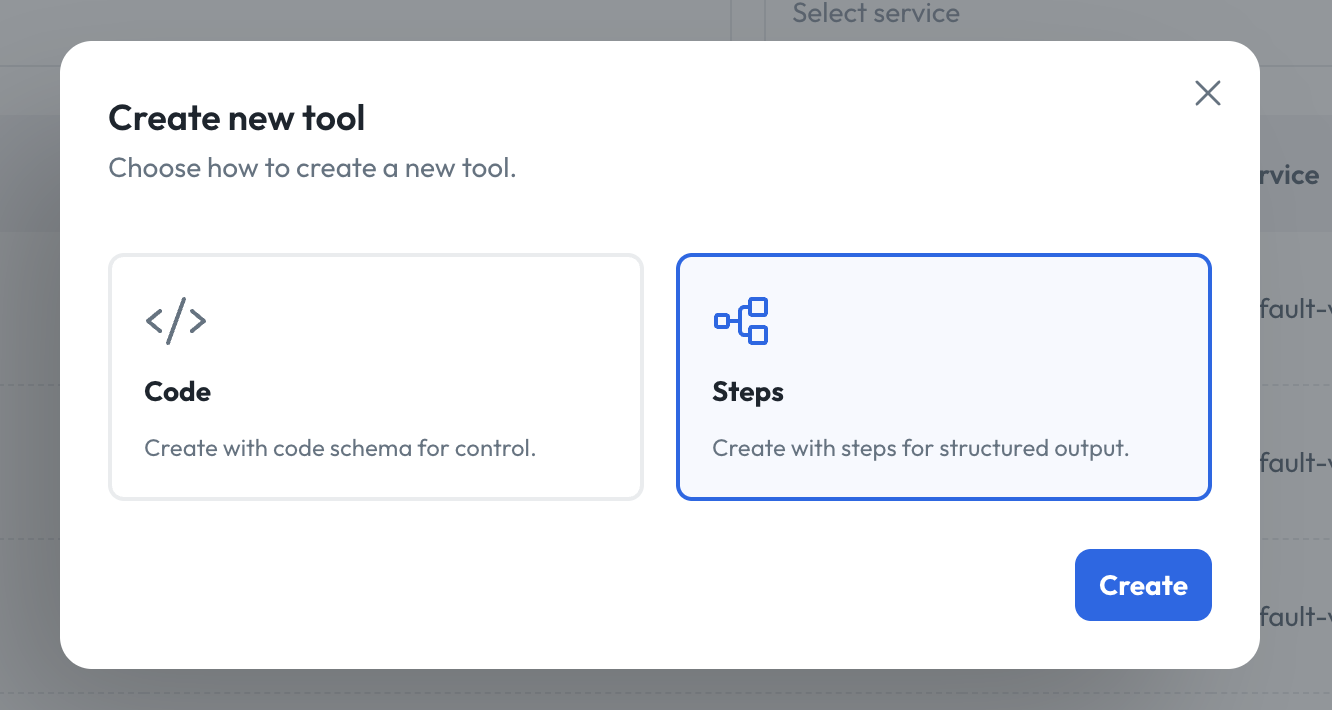
Step tools
A Step Tool (a specific kind of Tool) enables taking long, structured, form-filling instructions from an agent’s prompt and offloading it into a dedicated tool. Now, the agent has a more simplified, streamlined, cheaper prompt that can just call a structured, multi-step workflow tool when needed. By utilizing progressive disclosure and logic, the tool exposes only the context relevant to the active step to the agent, which minimizes agent cognitive load, sharpens task focus, and renders complex workflows significantly more testable and maintainable. For the full technical reference and a step-by-step tutorial, see the Step Tools documentation.
Definitions
- Step: A single, isolated “stage” of the workflow. Each step defines a specific goal or set of data to be collected. Think of it as a focused micro-prompt.
- Transition: The logic or UI bridge that connects one step to the next. It defines the “flow”—ensuring the agent moves forward only when specific criteria are met.
- Steps First: It’s useful to have a plan of how many steps the tool will require, and create all the steps first.
- Solo Steps: You can create standalone steps that do not transition to any other step.
- Connected Transitions: However, you cannot transition to a step that does not yet exist. You must first create the destination step, then go to the origin step and transition to it. (e.g., If I have Step A. I must first create Step B. Then go to the transition section in Step A and select Step B.)
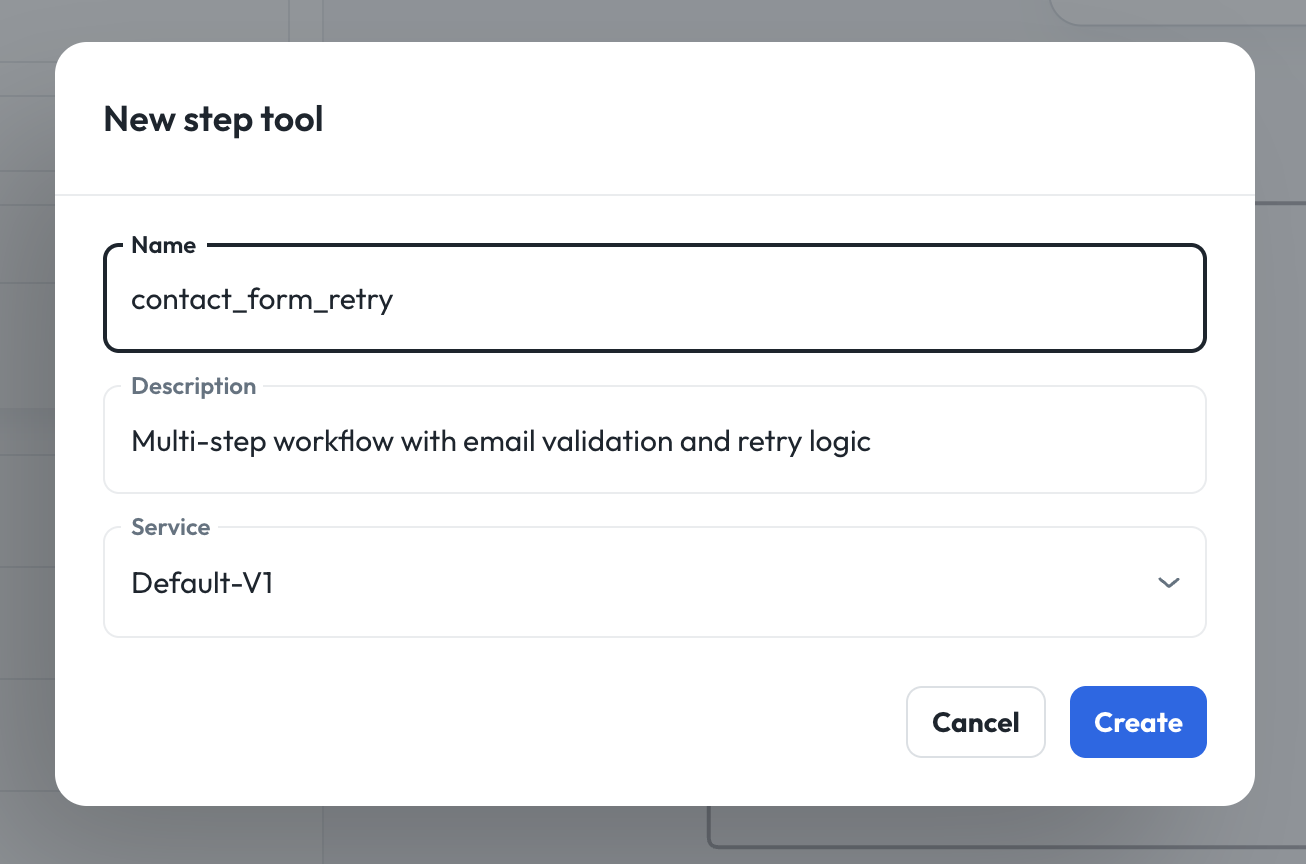
- Name (Required): The name of the step tool. Must be unique, and contain no spaces.
- Description (Required): The description of the tool.
- Service (Required): The associated service for the tool.
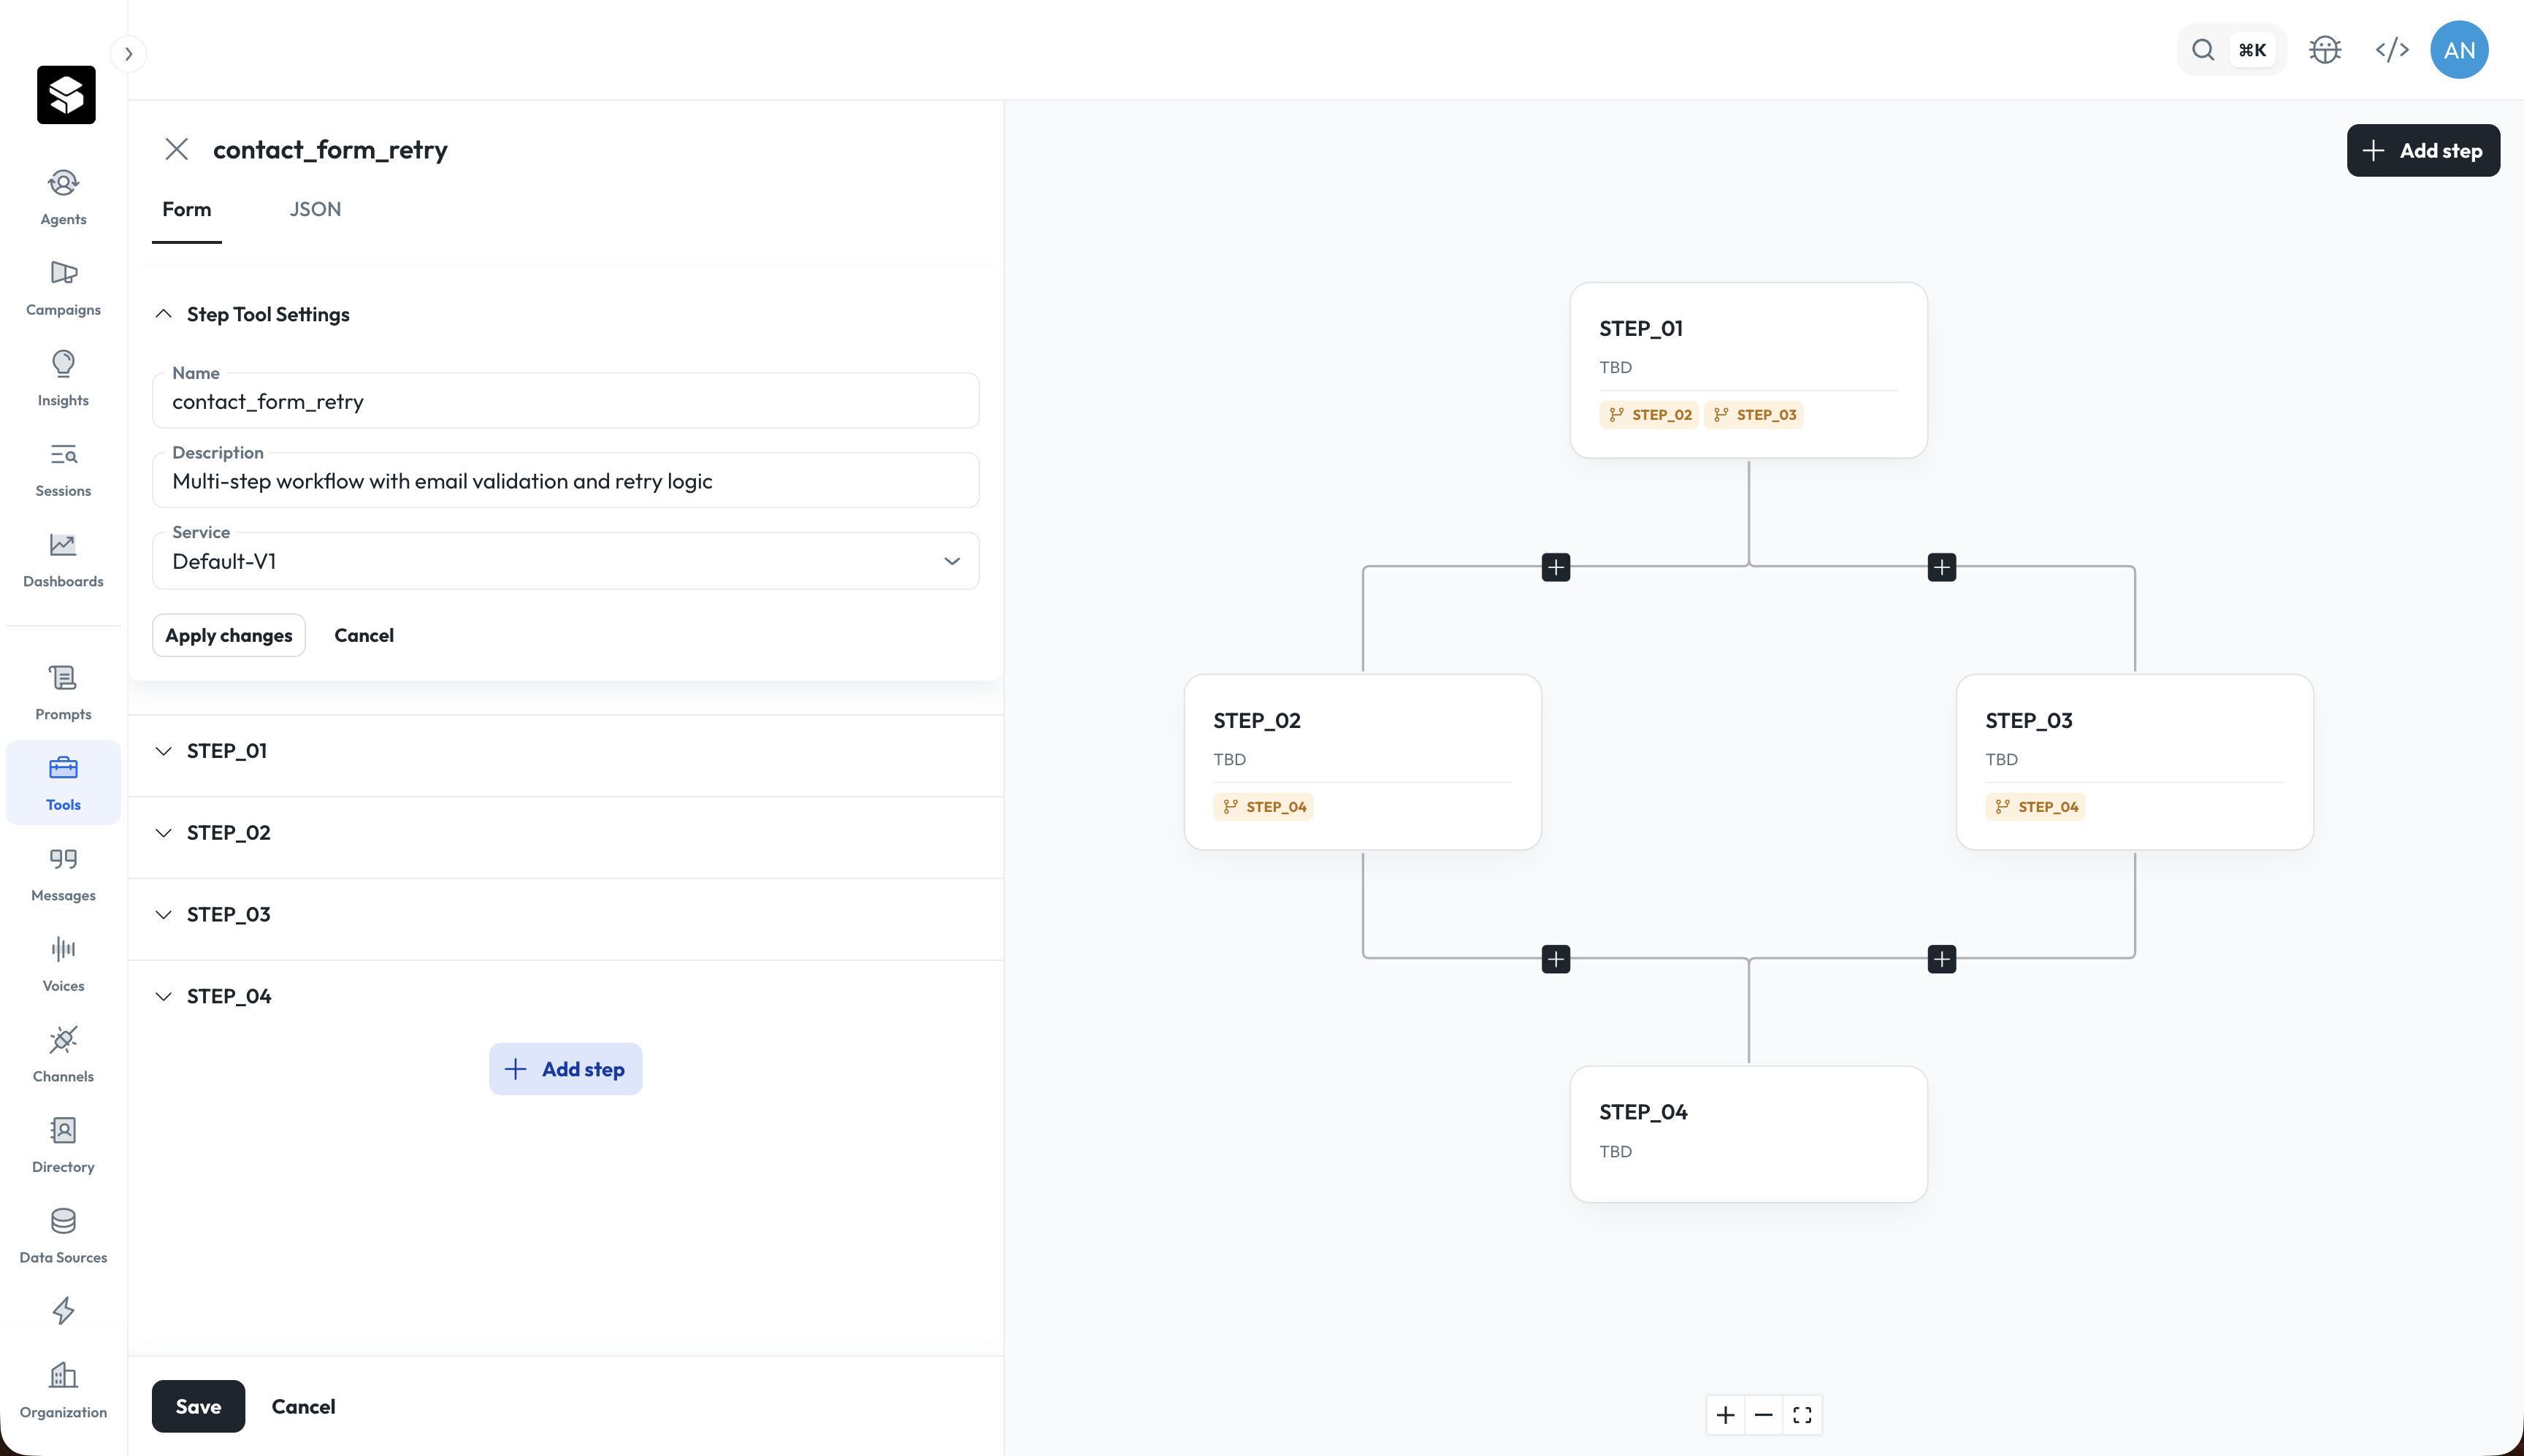
- Form: For users who prefer being guided through form field UI, in a more user-friendly way, you can fill in form fields in the Form tab. This provides guidelines on conditional logic and as long as you fill in the required fields, it should pass all validation errors.
- JSON: For users who prefer high-level control and have familiarity with JSON, you can just copy-paste configurations from other tools. And then resolve validation errors.
- Import/Export: You can paste raw JSON to generate the tool instantly.
- Validation: You must save changes to validate the JSON against the required schema.
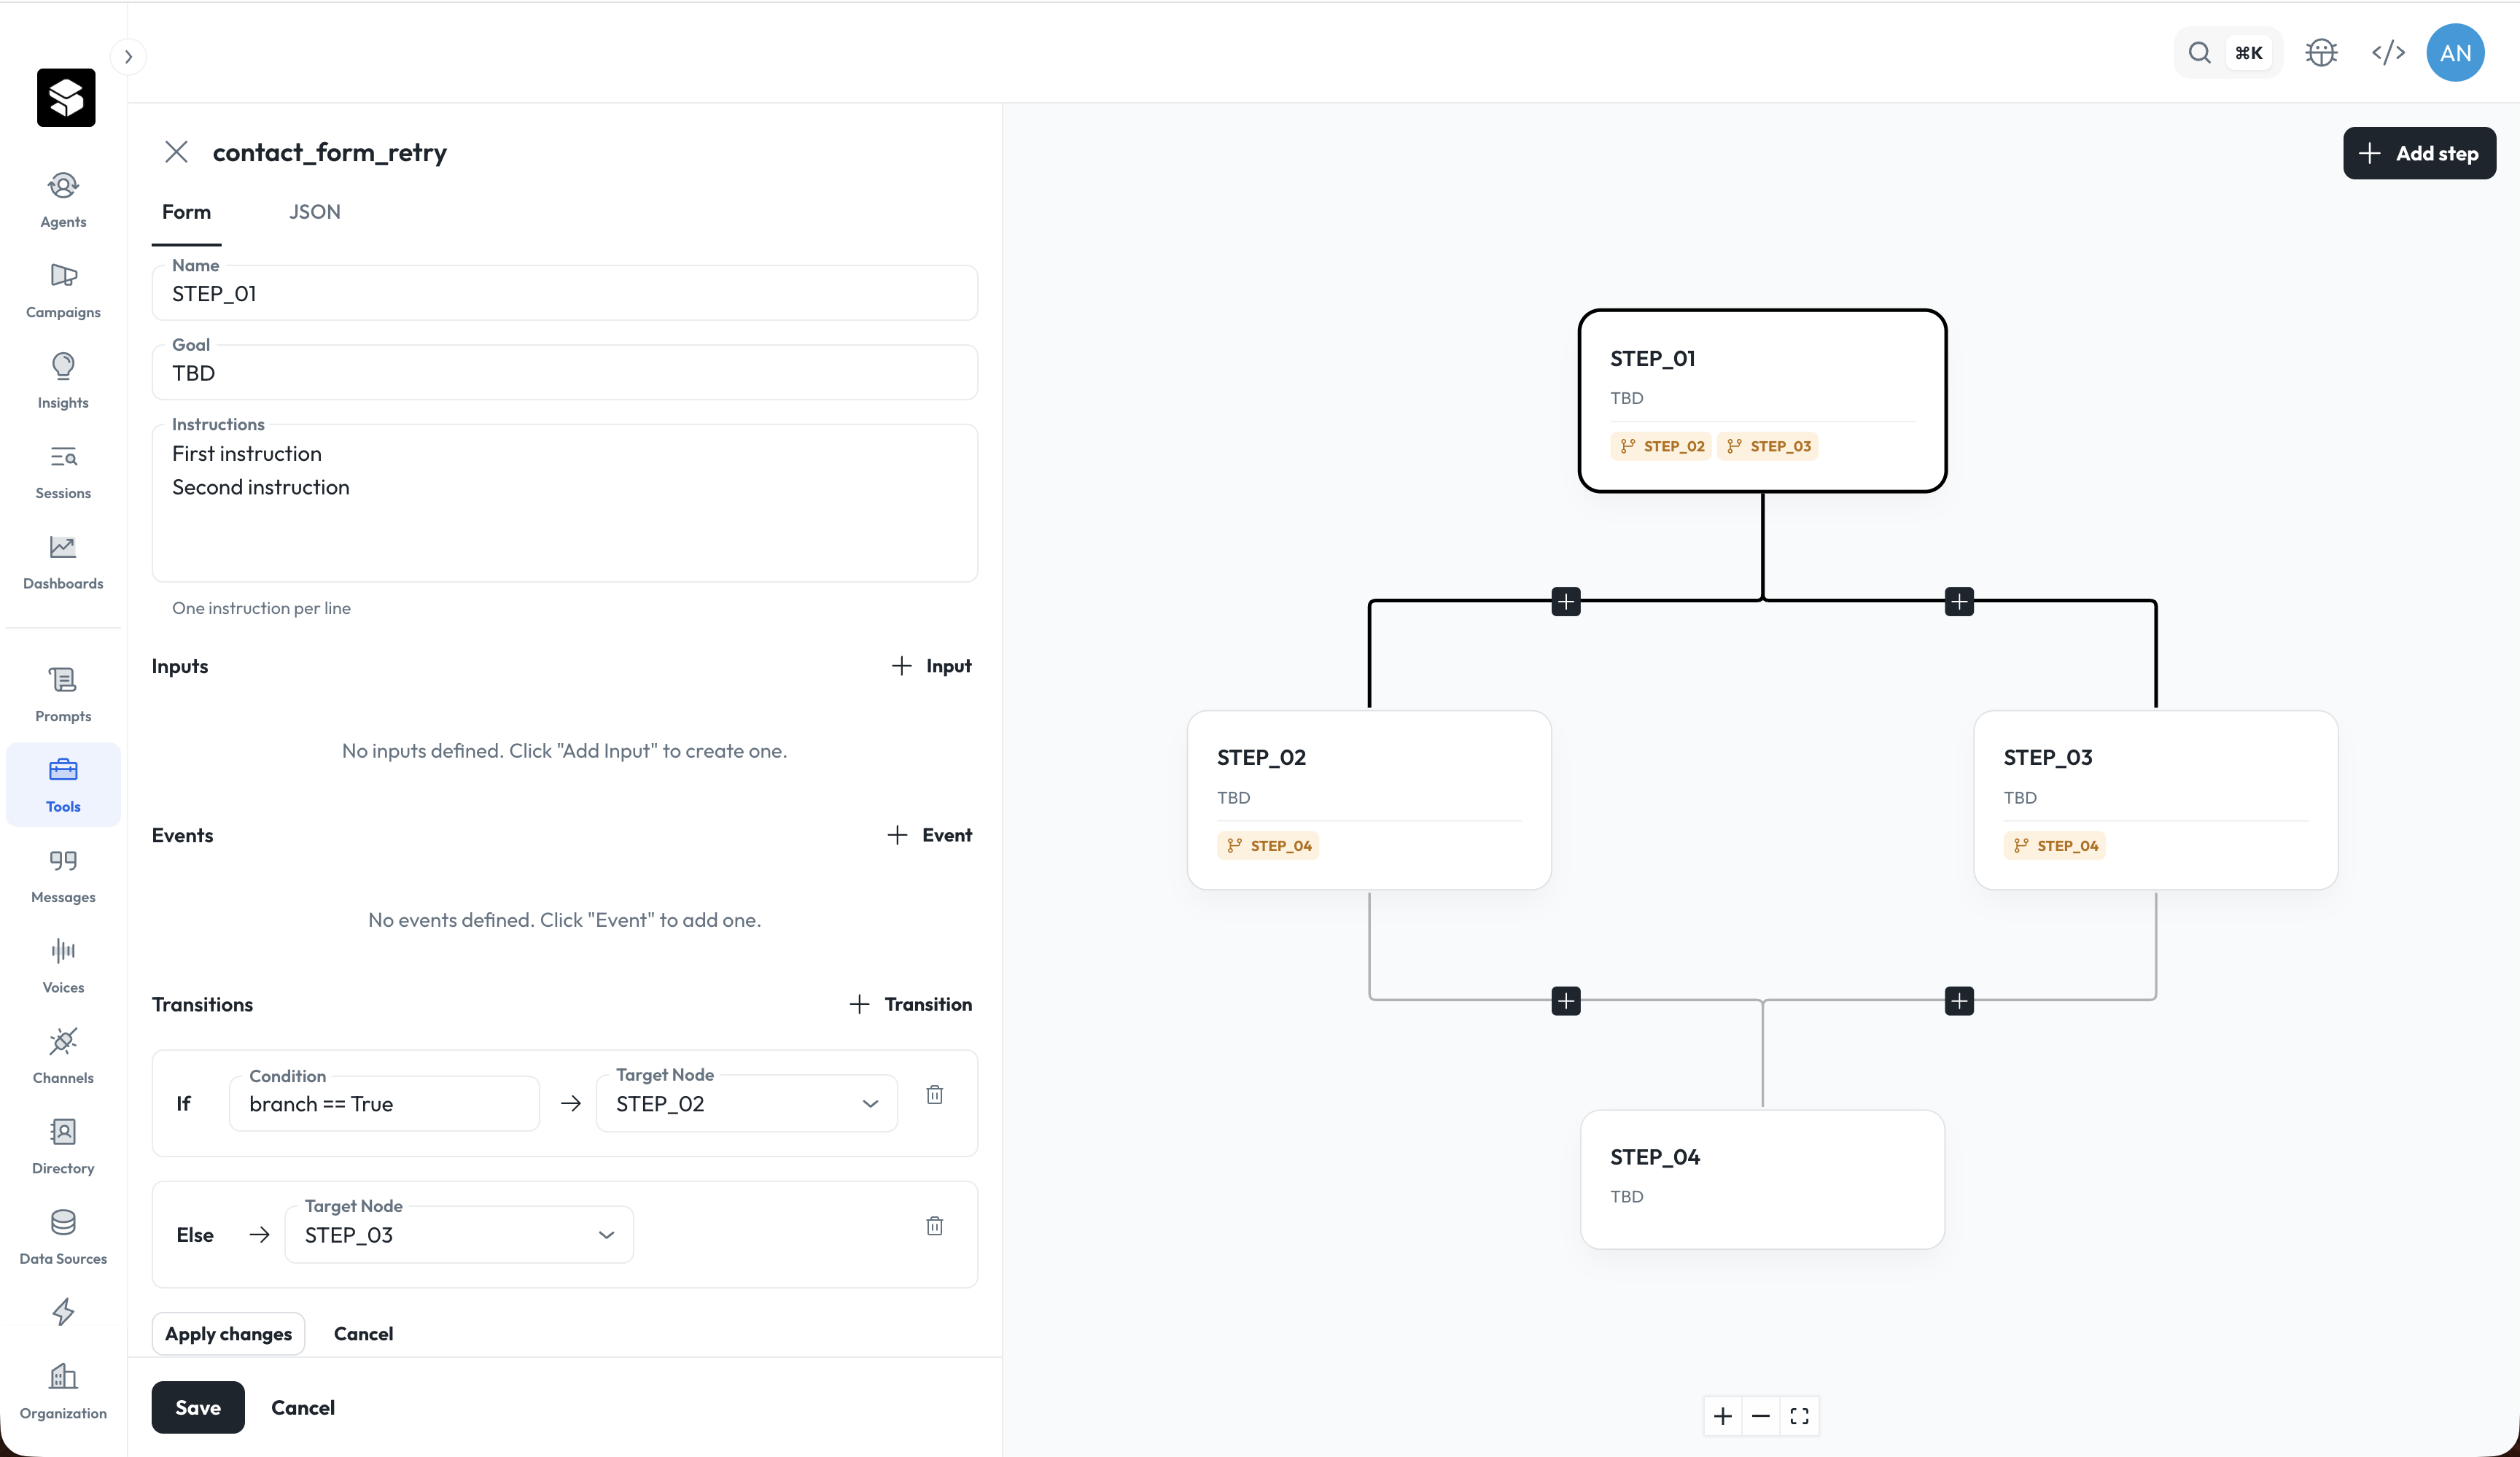
- Name: The name of the step to be referred to in transitions.
- Goal: The specific outcome this step is trying to achieve.
- Instructions: Specific prompts sent to the LLM to guide it through this specific step, including any relevant tool calls.
vars.* session variables). Type @ to open a picker for tools in your organization and JMESPath functions. For full details, see Console Editor in the Step Tools reference.
2) Inputs
Inputs act as variables for the step. You can add multiple inputs to capture specific data points.- Name: Name of the input, used to reference the value in later conditions (e.g., answered_relationship).
- Type (optional): Type of input, supports string, boolean, integer (whole numbers), and number.
- Required checkbox: Checkbox for whether step can be completed without this input data.
- Description (optional): Description of the input
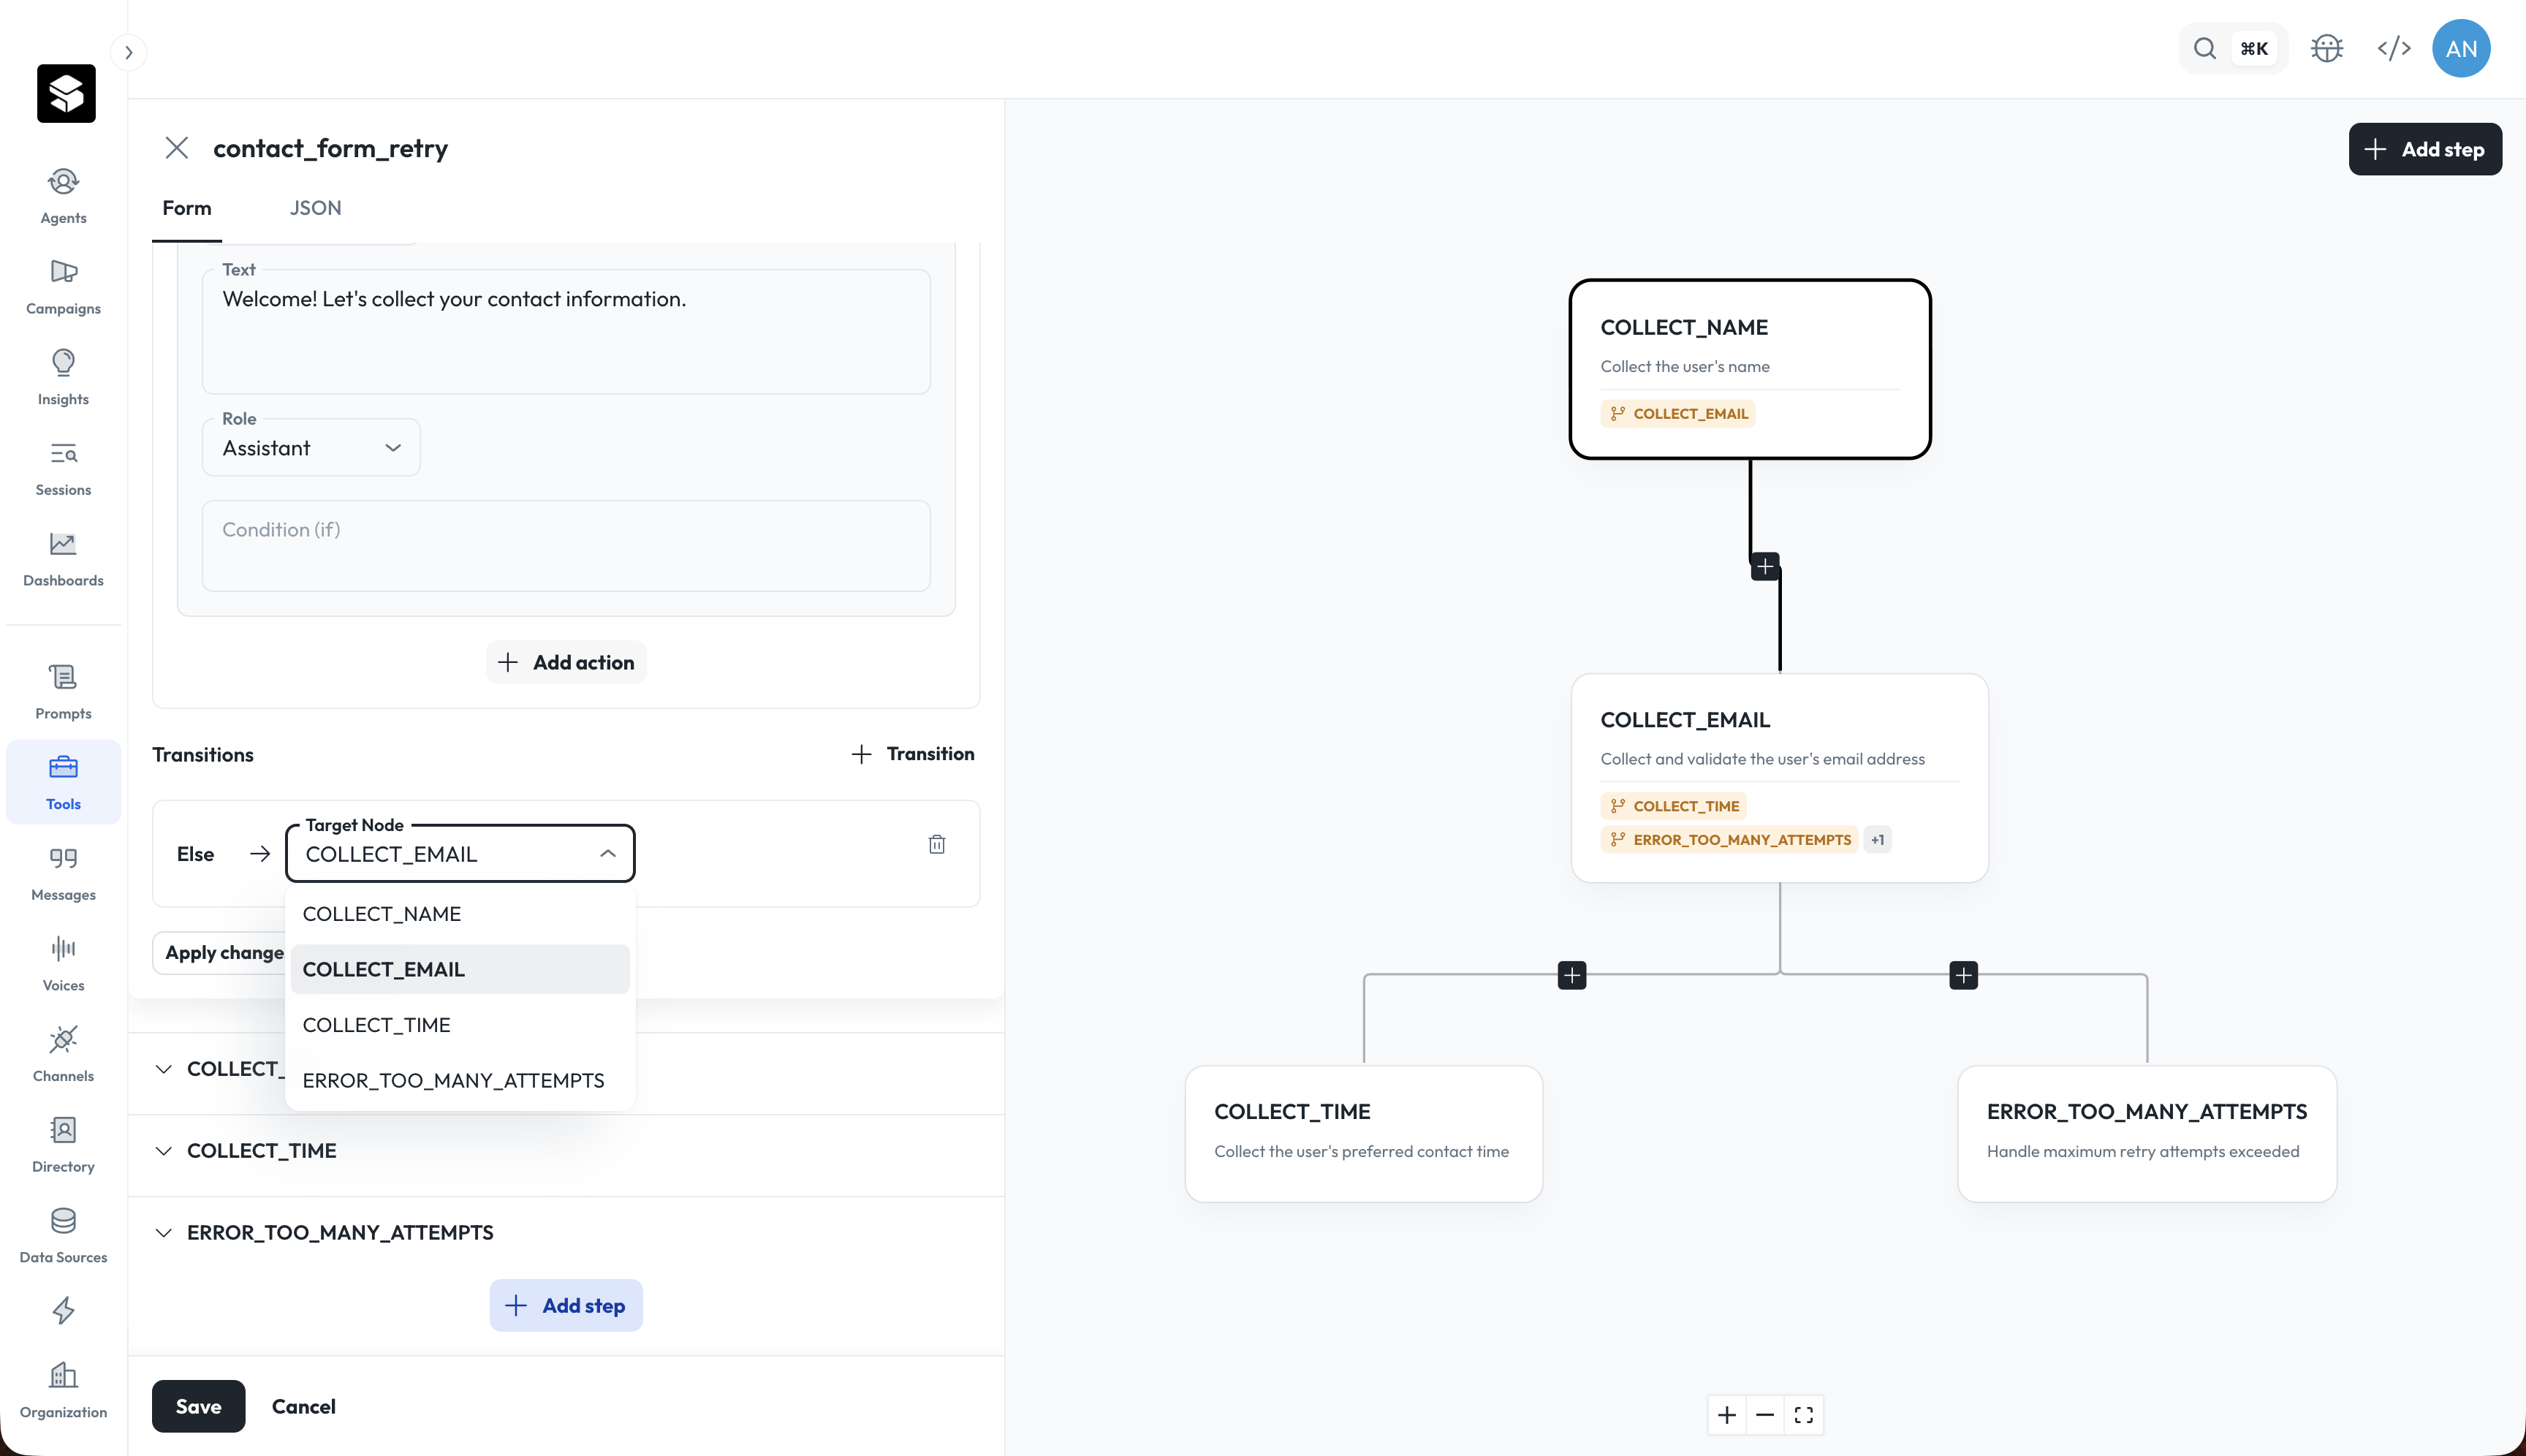
3) Events & Actions
- Events trigger logic at specific lifecycle stages: Enter, Presubmit, and Submit.
- Based on the event, different actions are supported. (e.g., “Enter” event doesn’t have the “Save” action, but the “Submit” event does.
Within each event, you can add Actions. Actions are operations executed in response to events.
Actions by Event
4) Transitions
Transitions are the lines connecting your boxes. They define the “path” through the tool.
- Branching Types: Supports only-If, If-Else, and only-Else transitions.
- Note: You can only have one only-Else transition per Step.
- Tip: Recommend creating all steps needed first, then start linking each step through transitions. To link Step A to Step B, you must create Step B first.
Because you cannot refresh the diagram without applying changes, there are a few things to note:
- Cannot switch JSON/Form tabs while editing: If you are working in the JSON tab and want to switch to the Form tab, you will need to first “Apply changes” and “Save” before switching modes.
- Cannot add step while editing: If you are currently editing a step and haven’t saved or applied your changes, you will not be able to add a new step. You must first “Apply changes” or “Save” before adding a new step.
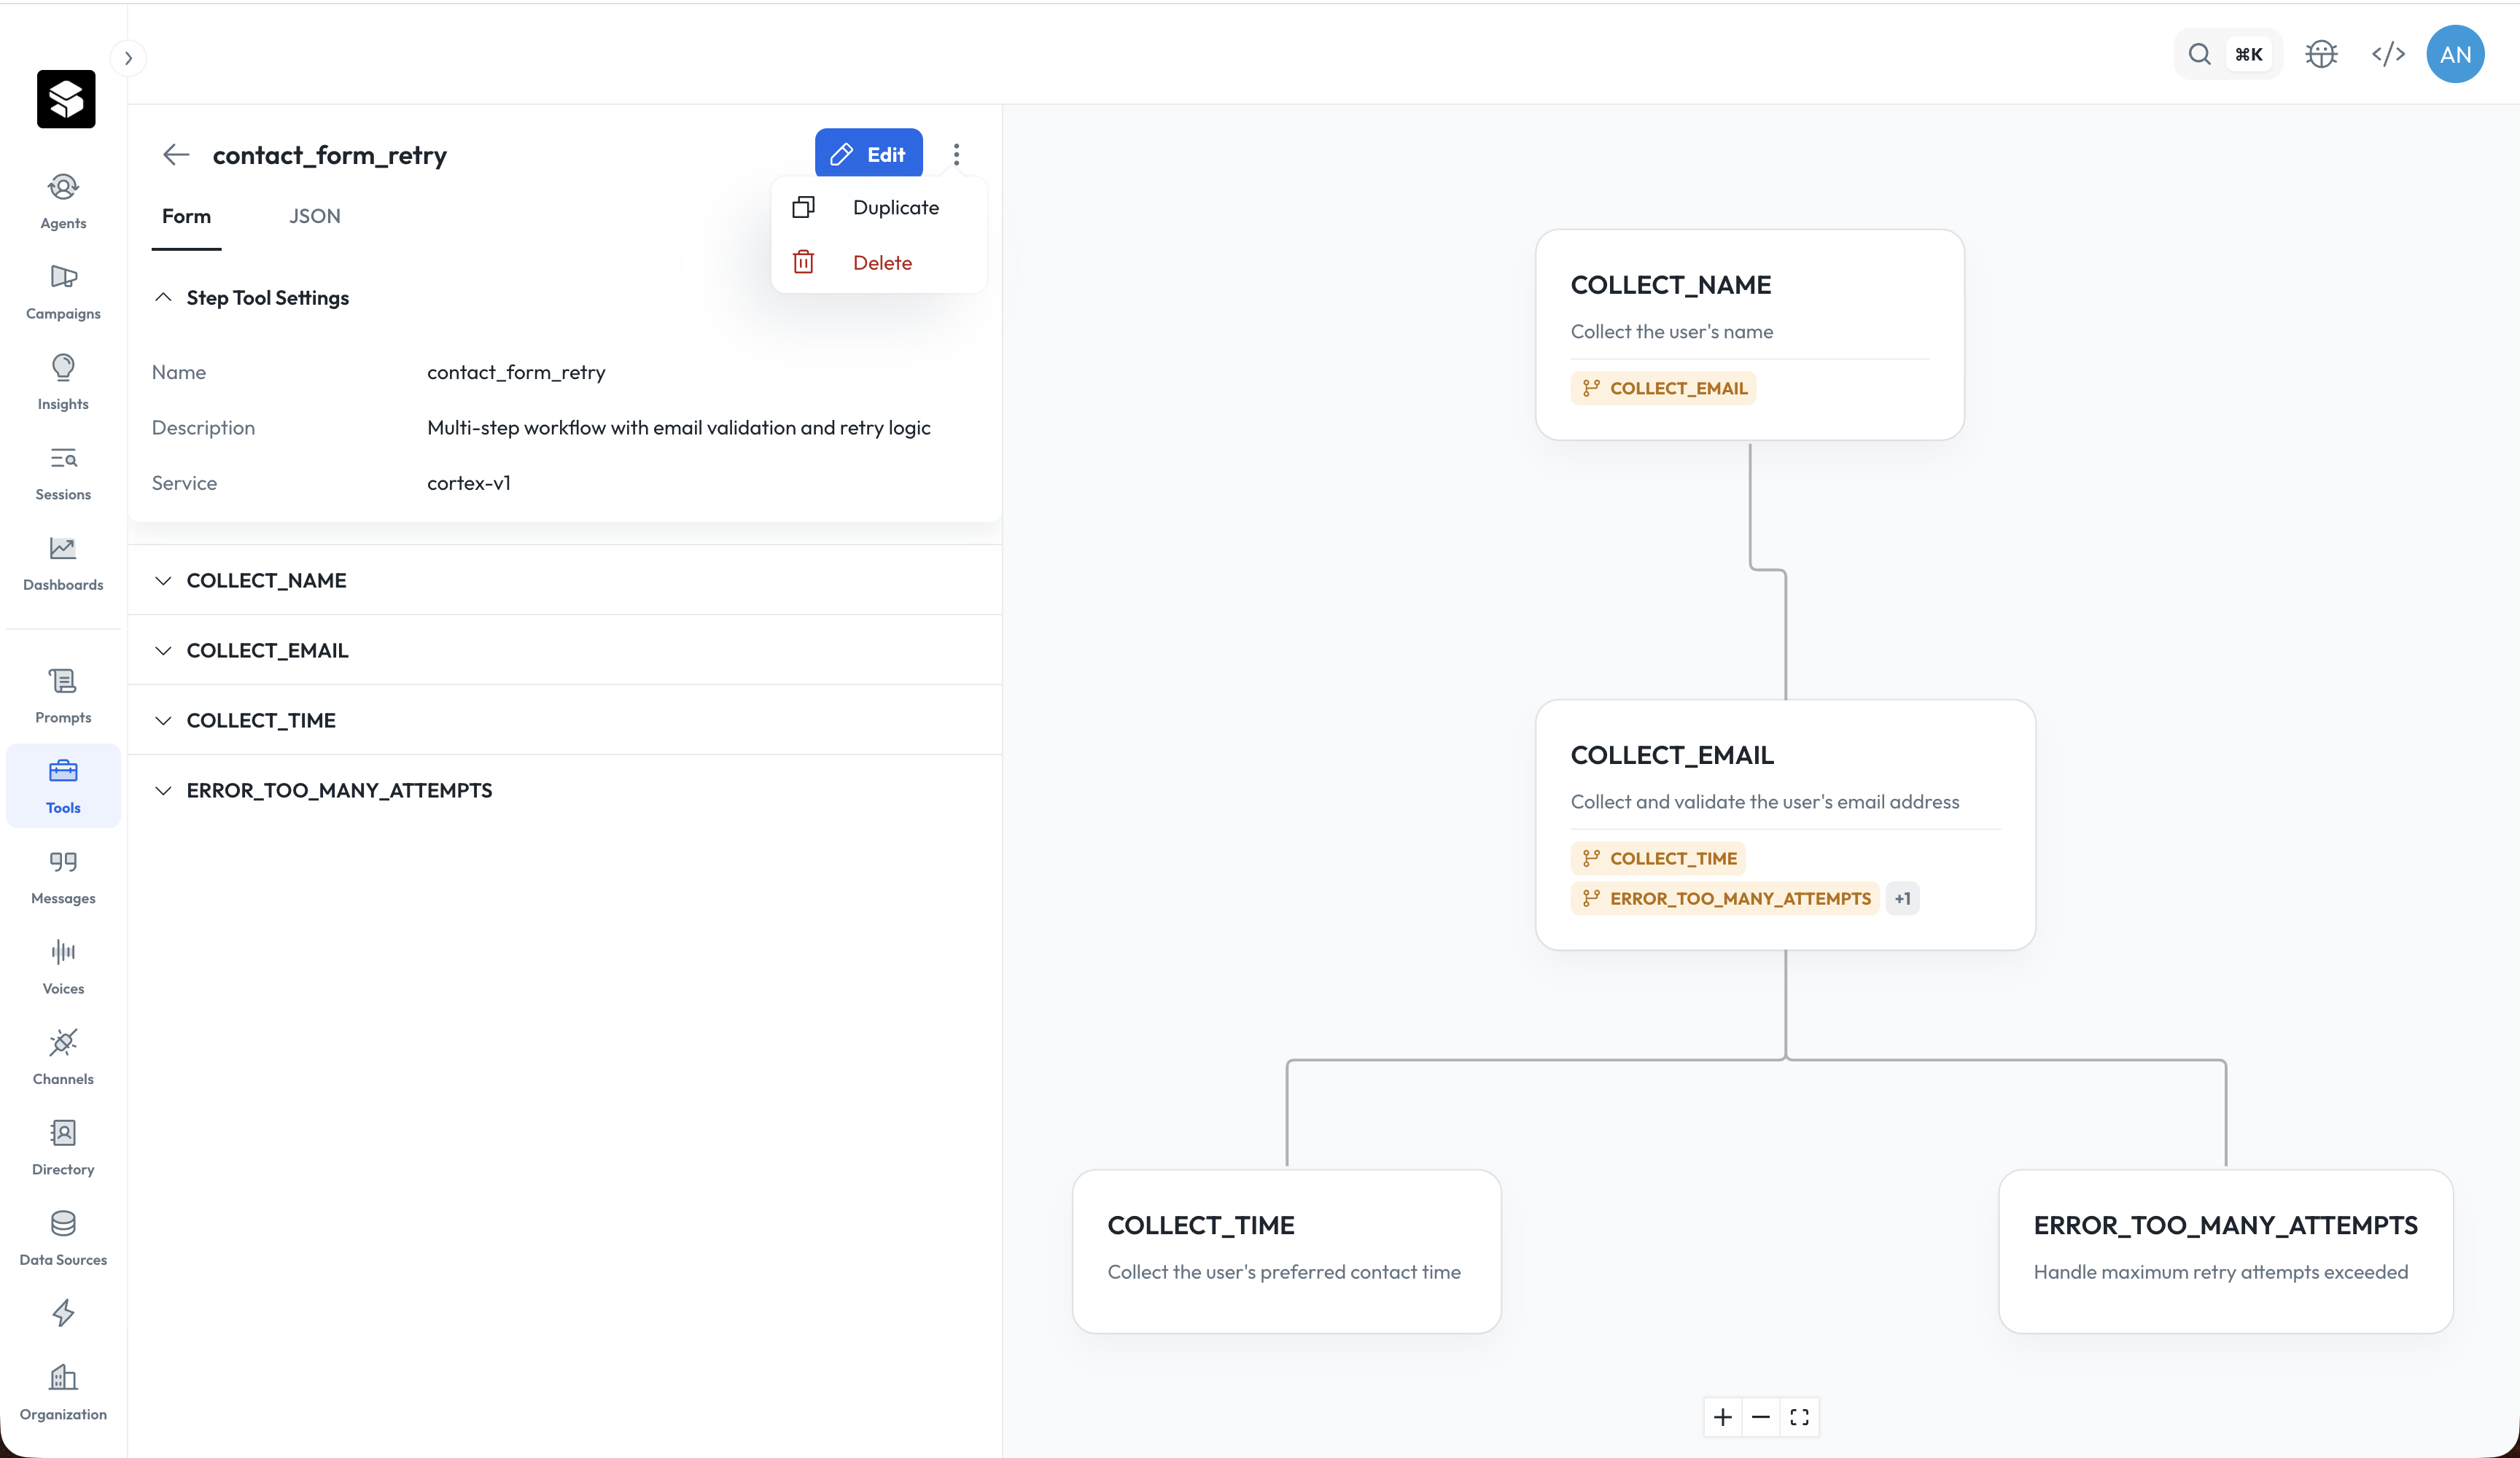
- To edit, click the Edit button.
- To delete, select the 3-dot more icon and select Delete. You cannot delete if the tool is assigned to a prompt. You must first remove the tool from all prompts before you can delete it.
- To duplicate, select the 3-dot icon and select Duplicate. The tool must have a unique name.
- Update the tool name to a unique name in your organization
- Update the description, currently it’s blank
Version history
Version history lets you browse all past versions of a tool, compare any two versions side by side, and restore an earlier version if needed—so you can safely iterate on tool configurations without fear of losing a working state.Viewing version history
The tools list displays the current version number on each tool row. How you access the full history depends on the tool type: Agent tools- Click on a tool to open its detail page.
- Select the Versions tab.
- Click on a step tool to open its detail page.
- Click the menu icon (☰) in the top-right corner.
- Select Versions.
Comparing versions
To see exactly what changed between two versions:- From the Versions tab, use the version selectors to choose two versions to compare.
- A side-by-side diff opens showing changes to the tool’s configuration and schema.
Restoring a version
To roll back a tool to an earlier state:- From the Versions tab, click on the version you want to restore.
- Review the version details to confirm it’s the right one.
- Click Restore.