A data source is a predefined blob of text containing structured, semi-structured, or unstructured data. You can configure a data source to provide context to an agent that it can use when answering a user’s questions. This can have significant latency advantages over including this information in the agent’s prompt (more details below), as well as allows you to provide different agents with different knowledge bases even if they all use the same prompt.

We recommend that you separate information between prompts and data sources such that the prompt is limited to instructions to the agent for how it should behave, and the data sources are limited to domain knowledge that the agent should have.

Creating a data source

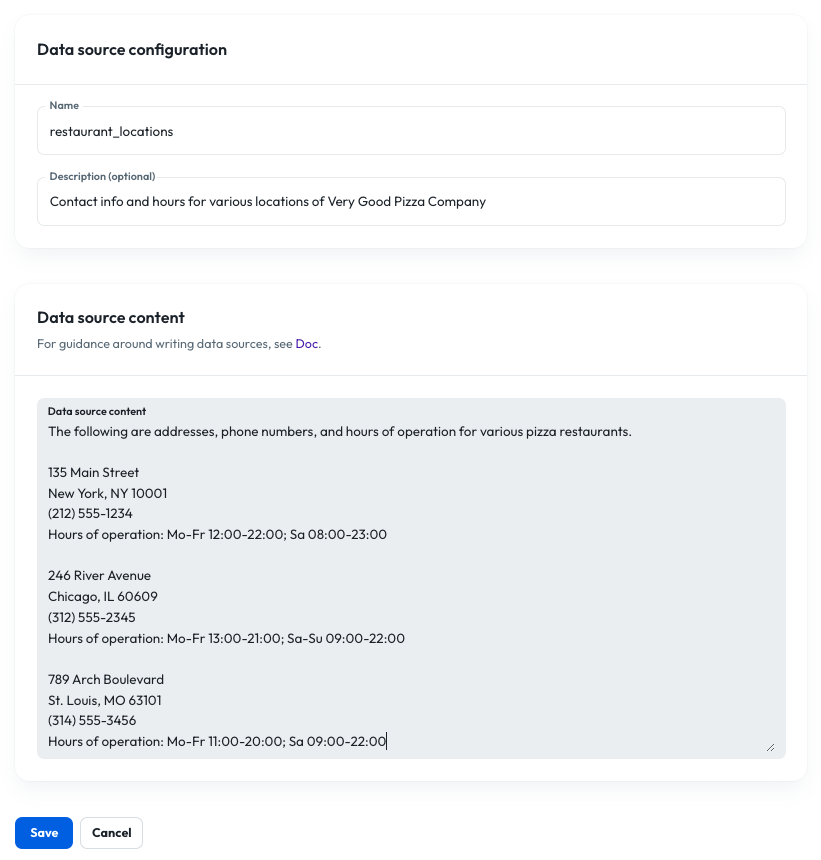
Go to the “Data Sources” tab on the side toolbar and click “New data source” on the top right.

  • Name: This is the name under which the data source will be stored. It must be unique within the suborg and cannot contain any whitespace.
  • Description (optional): User-readable description of the data source.
  • Content: The actual text content of the data source. (Note the sentence at the beginning of the content. It can significantly improve search performance if you include a statement like this providing context to the LLM for what the data represents.)

Linking a data source to an agent

  1. Create one or more data sources and note the names.
  2. Create a tool with the following schema (specify whatever tool name you want).
{
  "type": "endpoint",
  "tool": {
    "type": "function",
    "function": {
      "name": "tool_name_here",
      "description": "Look up general information in the organization’s documentation data sources. Returns an answer and a reference URL. Usually do not include the reference URL in the spoken response.",
      "parameters": {
        "type": "object",
        "required": [
          "question"
        ],
        "properties": {
          "question": {
            "type": "string",
            "description": "A user inquiry about content in the agent’s documents, e.g. Which forms do I need for my application?"
          }
        }
      }
    }
  },
  "endpoint": {
    "url": "http://helix-app/v1/search",
    "method": "post",
    "argumentLocation": "body"
  },
  "defaults": null,
  "staticParameters": [
    {
      "name": "doc",
      "description": "Data sources to which the tool should have access",
      "required": true,
      "type": "data_source_list",
      "default": [
        "your_data_source", "your_other_data_source", "etc"
      ]
    }
  ]
}
Note that the static parameter must be named “doc” in order to successfully access the search API. Additionally, the strings in the default list for “doc” must be the names of your existing data sources.

  1. Create a prompt that has access to the tool you created.
  2. Link an agent to that prompt.

Note that if you later create another agent that you want to have access to different data sources, you can link it to the same prompt but override the default “doc” values on that agent (see “Tool configuration”).